Before You Begin
Before cutting or fastening the molding, lay the material out on a flat surface and allow it to relax toward its natural shape.
Allowing the material to reach room temperature, particularly if it has been stored or shipped in cold conditions, may help expedite this process.
- Verify that the molding profile and application are correct before cutting.
-
Make sure the installation surface is flat, smooth, and ready to receive
the molding. Flexible molding will tend to follow irregularities in the surface.
-
Do not paint, stain, or otherwise finish the molding before installation.
Flexing the material during installation may damage the finish.
Cutting and Shaping Flexible Molding
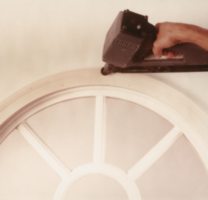
Flex Trim moldings can be cut, sanded, and shaped using typical woodworking tools.
- Hold the material firmly against the table or fence when cutting.
- Cut the molding slightly long, then trim or shave it to the exact length.
-
When shaping or removing material, use several shallow passes rather
than one deep cut.
-
Do not sand or reshape the surface of stain-grade molding.
The embossed wood grain is molded into the surface of the material and may be damaged or removed by sanding or aggressive shaping.
Fastening Flexible Molding
For most installations, the preferred method is to apply a continuous bead
of suitable construction adhesive along the back of the molding, then use
only enough nails to hold the molding securely in position while the adhesive cures.
Flexible molding can be relatively heavy, and nails may create small dimples
in the surface that must be filled before finishing. Using adhesive provides
support along the length of the molding and reduces the number of nails required.
In some applications, the mounting surface may not provide a suitable bond
for adhesive alone. Additional mechanical fasteners may be necessary to support
the molding securely. Conversely, where the substrate and application allow,
adhesive alone can provide the cleanest installation by eliminating nail dimples
and the filling they require.
-
Test-fit the molding and determine its placement before applying adhesive.
-
Use a construction adhesive that is suitable for both the molding and
the mounting surface.
-
When using adhesive and nails together, use only enough nails to hold
the molding securely while the adhesive cures.
-
Keep nails away from the edges of the molding to reduce the chance of
distortion or visible bumps along the edge.
-
Any nail dimples or other surface imperfections should be properly filled
and prepared before applying the final finish.
Joints and Miters
When joining sections of flexible molding, make clean, accurate cuts
and test-fit the pieces before fastening them permanently.
-
A thin cyanoacrylate adhesive, commonly known as super glue, may be
used to help bond joints and miters.
-
Keep joint adhesive off visible surfaces whenever possible.
-
Allow joints to fully set before placing unnecessary stress on them.
Painting Flexible Molding
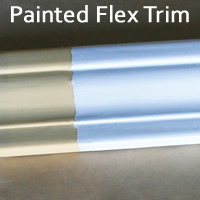
Flexible molding should be installed before it is painted.
-
Clean the molding thoroughly before painting using soap and water
or mineral spirits, as appropriate.
- Allow the surface to dry completely before applying finish.
- A primer coat is recommended but is not always required.
-
Most common paints work well with Flex Trim when applied according
to the paint manufacturer's instructions.
-
Do not paint the molding before installation. Flexing the material
may crack or damage the finish.
Staining Flexible Molding
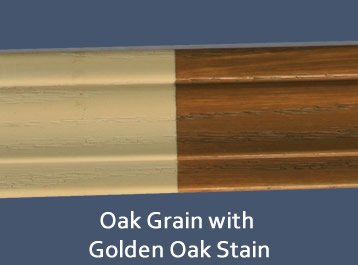
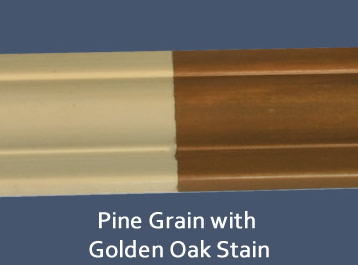
Many Flex Trim profiles are available in a stain-grade version with an embossed wood grain.
If you intend to stain the molding, the stain-grade version must be specified when ordering.
Not all profiles are available in stain-grade.
Important:
Do not sand or significantly alter the grained surface. Doing so can
damage the wood-grain appearance.
- Install the molding before staining.
-
Make sure the surface is clean and free of dirt, dust, and oils.
Clean with soap and water or mineral spirits if necessary.
- Mask adjacent surfaces that should not receive stain.
-
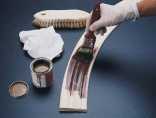
Apply a heavy-bodied or gel stain with a brush, working the stain
thoroughly into grooves and detailed areas.
-
Using a clean, dry brush, begin removing excess stain from the surface.
-
Wipe excess stain from the brush onto a clean rag as you work.
-
Continue removing and blending the stain until the desired color
and appearance are achieved.
-
After the stain has dried, apply an appropriate protective clear coat using a spray can or spray equipment.
Avoid applying the clear coat with a brush, as brushing may disturb or remove the applied stain.
Interior and Exterior Applications
Flex Trim is suitable for both interior and exterior applications.
However, flexible molding should be treated as a finish molding product
rather than as unfinished PVC trim.
When left unfinished for extended periods, especially outdoors,
the material may darken and exposed surfaces or edges may gradually
show signs of weathering.
For best appearance and long-term performance, all installations
should be properly finished after installation.